Sterilizing chicken coop is very important for keeping these beautiful birds. Sterilizing chicken coop not only help the birds to stay healthy and productive but also it helps to ensure the well-being of the poultry.
Sterilizing chicken coop before bringing new chickens or chicks to your coop helps a lot keeping your birds healthy and diseases free. Chickens can carry various types of bacteria and fungi that can spread from one chicken to another and sometimes throughout the coop and farm.
If anyhow one of your chickens of the flock get affected by diseases, then it can spread the illness among the birds quickly. That can causes serious health issues or even death for some birds.
So, sterilizing chicken coop is very important for keeping your chickens healthy and stopping the spread of diseases or illness. Learn more about how to sterilize chicken coop below.
Why Sterilizing Chicken Coop is Important?
Sterilizing a chicken coop is very important for maintaining good health and well-being of your poultry. A clean and sanitized environment prevents the spread of diseases among chickens, reduces the risk of pests and parasites, and ensures higher egg quality.
Sterilizing chicken coop also extends the lifespan of coop infrastructure and promotes good biosecurity practices, protecting both your chickens and humans from potential health hazards.
Sterilizing chicken coop contributes to a more pleasant and odor-free environment, enhancing the overall living conditions for your feathered friends. Ultimately, it supports sustainable and responsible poultry keeping practices, minimizing the use of harmful chemicals and promoting eco-friendly solutions.
Steps for Sterilizing Chicken Coop
Illness spread very fast among the poultry birds, especially in young chicks. So before bringing new chickens into the coop, sterilize the coop perfectly. Also sterilize the coop after chickens have been ill.
Sterilize the coop on a regular basis. You must have to sterilize your coop at least once a year, even if you have not had any new or ill chickens.
During sterilizing chicken coop, remove all of the chickens from the coop and keep them in a secure place. Keep the ill chickens in a safe place separated from the healthy one.
Step 1. Cleaning Chicken Coop
Before sterilizing chicken coop, remove all types of disposable, consumable and waste items from the coop. Completely drain water containers.
You can use a shovel for removing manure and the dirt soiled by bodily fluids. Sweep the coop thoroughly for removing maximum amount of potentially contaminated material from the coop.
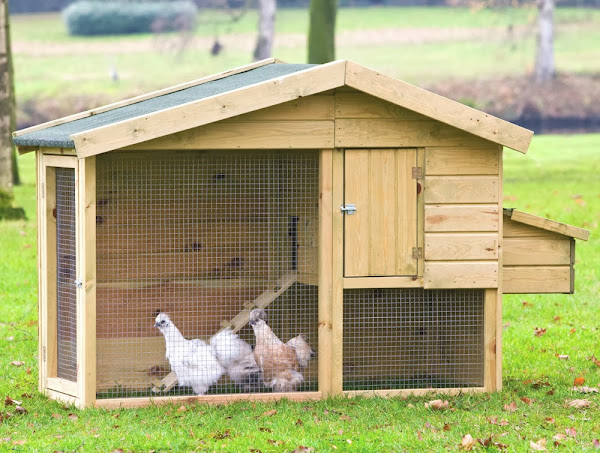
Step 2. Choosing Your Disinfectant
You must have to use a high quality disinfectant for sterilizing chicken coop. You can use bleach because it is very effective for killing germs and bacteria and it doesn’t contain harsh chemicals.
Use vinegar to disinfect your chicken coop without potentially exposing your birds to hazardous chemicals. Be very careful sterilizing chicken coop if any of your chicken are ill.
In this case follow expert’s suggestion or consult with your nearest vet about a suitable sterilizing system. Always use specific disinfectant product, based on the exact bacteria or diseases that you are trying to eliminate from your chicken coop.
Step 3. Sterilizing Coop Accessories/Equipment
Remove all types of poultry equipment from the chicken coop and keep those in another place far from the coop. Remove any type of food dish, water container, toy etc. from the coop.
Gather all those items in a place and rinse them thoroughly with a water hose for removing maximum dirt and diseases. You can also submerge those items in a tub filled with disinfectant.
Depending on the sizes of items, soak them for at least 30 minutes before removing them from the disinfectant and completely drying. Use spray items down with disinfectant, if your items are too large to soak in the tub.
Completely cover the items with disinfectant and keep it for at least 30 minutes and them rinse with the hose and allow it to dry. After completing all the process and drying the items, you can return them to the coop.
Step 4. Sterilizing Coop
Use a water hose and spray down the inside of the chicken coop thoroughly. Try to remove maximum amount of dirt and debris. Remove dirt anywhere it is caked on by using a scrub brush.
You are ready to start sterilizing the coop, after this initial rinse. Pour the disinfectant into a spray bottle and spray liberally around and inside the chicken coop.
Ensure to cover every inch of the floor, walls and ceiling of the coop. Never use a dryer for drying the disinfectant. Instead, allow the disinfectant to dry naturally and never wipe or rinse the disinfectant before it dries.
After completely drying the coop, you can replace bedding and other disposable items with new materials into the chicken coop.
Sterilizing chicken coop on a regular basis helps to keep your chickens healthy, productive and diseases free. Broiler chicken coop needs to be sterilized frequently than the layer coop. However, do this process regularly and ensure a healthy environment for your chickens.
Hope this guide has helped you. Good luck and may God bless you!


Very informative. But i would appreciate if you would specify how much bleach (eg 1 litre) to be diluted in how much amount of water.